Friday, December 16, 2011

Christmas Photo


This is an amazing project.  It does take a little time but it is well worth the effort!


Supplies are an 8x10 canvas, mod podge, tissue paper, and if you want yours to be over the top, a small set of battery operated lights.


Choose a photo on your computer that will be the picture in the final project.


Wrap tissue around a piece of card stock and insert into printer to print out your picture.


Allow to completely dry and then remove.  Next decide where your photo will be placed on the canvas.  You will then cover the CANVAS with mod podge and place the photo on top.  It is helpful to start at the bottom and work you way up smoothing as you go.


This is what it should look like.


Then coat the entire surface with mod podge.  Be careful because you can tear the tissue paper.  Allow to dry and you are finished.  IF you want to take it a step forward you will then need to punch holes in the canvas with a large needle or an illet setter.  


Put lights through and you are finished!

If you have questions be sure to email


Hope you enjoy!  And if you are in a bind for a Christmas present, you could do the same process with a photo of your children for your parents, or a scan an art project of your child's and apply the same way!


Friday, December 9, 2011

More Christmas- Wreath tree!


If you need some more room for your ornaments, or just want another decoration,  this is an idea for you!  Just hang a large wreath on the wall add lights and fill it with ornaments.  I added a ribbon at the top for a little extra!

Hope you find sometime this weekend to enjoy the Christmas season!

Wednesday, December 7, 2011

Easy Christmas Decorating


This is so simply and really cute!


This is the before!


Supplies should be right at hand!  Just some tape, wrapping paper, and ribbon.


Just wrap the pictures, be sure to leave out you hanger, add ribbon, and you are ready to rehang the picture!

Hope this is a fun easy project for you!  


Friday, December 2, 2011

Christmas Chandelier


Here is another project to help with Christmas decorating.  You only need a wreath some picks and a little ribbon.


Open up the pieces and just twist them on the chandelier arms.


Arrange picks around the wreath.


Add ribbon and you are done!  This picture is to show I just tied three pieces of ribbon around the bottom the have hanging down.

Have a great weekend!


Wednesday, November 30, 2011

Get your Christmas on!


For the next few weeks I am going to give decorating tips on Christmas decor!
Today we will start with a garland for the staircase.


My tip for saving some money is to buy longer pieces of pretty garland, and then cut it into pieces.  I also just cut the green garland into strips.  Later in the week I even found some pieces at the dollar store that would have made a nice look if you combined them in  this way.


So, after you have cut the pieces simply lay the cut decorative garland on the green garland and use the green garland to hold it buy just twisting garland pieces to hold.  For the ribbon this is an easy way to make one!  Just tie a bow and leave enough room to add another bow.

Count your pickets and space out the altered pieces and attach the same way by using the "leaves" of the green garland and twist them around the post.

This can be the extent of your garland, or if you choose to enhance you can do like I did and add the loopy green garland along the way, bringing to a point at the pickets where you have applied the other garland pieces.

Please feel free to email with questions.

As always I am available for design services as well.


Wednesday, November 16, 2011

Thanksgiving table ideas

I have Thanksgiving on the brain today!  So, I thought you may be interested in some last minute ideas for your table.  
This photo above would be very easy to recreate with dollar store candles and some left over scrap paper.  For the letters you could use stickers if you have some, or just print them off the computer and cut them out!

I thought you may even have these items on hand.  As you can see it is just 3 baskets
some evergreens and pine cones from the yard and then just some oranges studded with cloves

Heres another one you may have on hand.  Use glass holders from around the house and then all you need to buy is some unshelled nuts.

This is super easy and very cute!  Just send the kids outside for a stick and cut it into small pieced and then add a slit!

I added this because if you click on the photo link it will send you to a site that
will allow you to download these place cards and then you will just print and use!

Hope you are enjoying getting ready for Thanksgiving and I hope this was helpful.

Remember to share on Facebook!  I am available for consultations!  For more information on my services visit my website here.


Friday, November 11, 2011

Thanksgiving decor


Make these candles to add to your Thanksgiving decor!  They can help light a small bath, or add some to your Thanksgiving table scape.


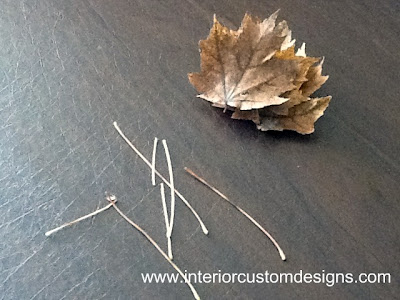
Supplies are votive holders, leaves from the yard, some Elmers glue and a paint brush.


Remove stems from leaves.


Dilute glue with a drop or two of water, then begin glueing leaves and brushing the outside to cover.  The glue does leave a mat finish, but to me it makes it appear frosted.  After they have dried, insert a tea light and you have a pretty Thanksgiving accessory!

Happy making!!

If you like this please be sure to use your share button on Facebook.

For information on my design services, please visit my website here.


Wednesday, November 9, 2011

Ideas for headboards


Last week I challenged you to send me questions for free advice.  Here is an answer to one...


"We recently moved into a rental house.  I am looking for ideas for a headboard or some treatment to go above our bed.  It’s a king bed, and the walls are white.  I’m a do-it-yourself kind of girl and would love a few ideas."

Now the key here is a rental home, so you most likely can't do anything too permeant. The above is a sticker.  These are great because they really leave no mark, and make for a great statement.


This idea is a little more involved and shows more than one piece, but it is very easy to go to the local hardware store and have wood cut to a size you desire, then add padding and staple gun fabric.  If you make this long enough to touch the ground, you could prop this up and use the bed to hold it in place.


Lastly I have included a headboard made from a crate.  This can be attached directly to a bed frame, and if you look around a warehouse area in your town, you may even get this one for free!

Please remember to send in your questions!  I can be reached here.

See you Friday!


Friday, November 4, 2011

Super Easy Light


This is such an easy way to have an accent light in any room.


These are all the supplies needed:  A decorative lantern and some christmas lights.
Most of these lanterns come with a hole in the bottom so you can replace the candle.  Just open the lantern insert the christmas lights, and you are ready to go!


Hope you enjoy this super fast and easy project!  Have a great weekend.

And, don't forget I will be choosing a question to answer on next Wednesday's blog, so if you have one please send it to my email, here.

Wednesday, November 2, 2011

Choosing color

photo from

This is a very pleasant room.  Does it remind you of something?


See it?


Isn't this a pretty bird?


photo  from

See a pattern?  The point is you only have to look outside to find great color combinations.
How about one more?


soooo cute!!


I hope this give you inspiration for the day, and the next time you wonder what goes together, think of an animal you really like.

NEXT WEEK I WANT TO TRY SOMETHING DIFFERENT!!!!

PLEASE PLEASE PLEASE
SEND ME
a design question here and I will choose one to answer!

Think of this as FREE design info!!


Friday, October 28, 2011

Dollar Store Entertaining Craft


This was a fast project and only cost $3.00, plus the cost of your glue!


Supplies are two plates one candlestick, and glue.


Glue the candlestick in the middle of the bigger plate.


Glue top of candlestick to second plate and you have a great serving piece, or display piece  for everyday use, or your next party.  I placed some silk leaves and gourds for a fall center piece.

Have a great weekend.  And remember I am always available here.

Wednesday, October 26, 2011

Add some color

                                                        photo via
  
This maybe too much color for you, but it is very exciting.  Just think coming home to this,  surely this would make you smile.

                                       photo via

How about this yellow, it is like having sunshine everyday, no matter the weather.

                                                       photo via

Okay, so if you are not that brave, try just one wall.  This fun dining room adds lots of color just through the one wall.

                                     photo via

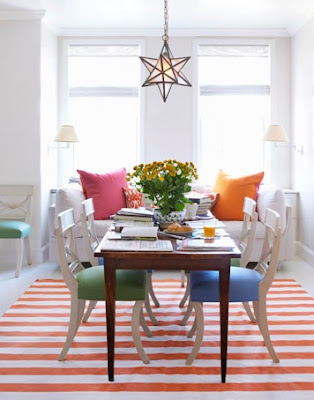
Lastly, this shows just a little color in the chairs, rugs, and pillows.  

Try adding some color today even if it is just a block of color in a frame.

See you Friday.

Friday, October 21, 2011

Super easy accessory


This will take you maybe 15 minutes!  

These are the supplies needed.
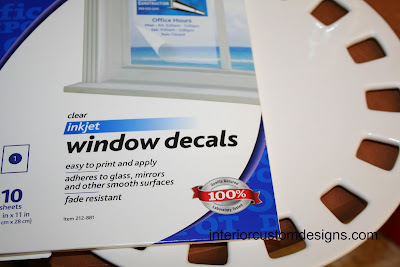
A plate, mine is an old one from a Southern Living party, but any will do you can even find one at the dollar store if you don't already  have one to use.  You will also need these window decal pack from an office supply store.
Decide on your design, mine was a very simple one.  But you could also choose a holiday inspired design.


  After you have made your design, read the directions on the decal sheets and print your design.  Then all you will need to do is peel off the design and apply to the plate.


Since my plate had these openings, I decided to tie ribbon around for some added interest. There you have it!


You can also hang it on a wall with a plate hook if you don't want to display the plate.

Hope you have a great weekend, and remember I am available for many services.  Visit my website, here, for a list of services.