Showing posts with label DIY. Show all posts

Friday, March 2, 2012

Too good not to repeat!


I got this from pinterest- but it is from the blog Hammers and High Heels.  There are some really pretty things on her page.

There are no directions.  It looks as though they used plate holders and hung them individually, but you could use E6000 glue and just glue in a wreath shape. I think plates may be really cool too!

I have seen silver/silverplated platters at thrift stores for 6-10$ a piece.  This would be such a fantastic high impact piece!

Give it a try!

Have a great weekend!

Friday, December 16, 2011

Christmas Photo


This is an amazing project.  It does take a little time but it is well worth the effort!


Supplies are an 8x10 canvas, mod podge, tissue paper, and if you want yours to be over the top, a small set of battery operated lights.


Choose a photo on your computer that will be the picture in the final project.


Wrap tissue around a piece of card stock and insert into printer to print out your picture.


Allow to completely dry and then remove.  Next decide where your photo will be placed on the canvas.  You will then cover the CANVAS with mod podge and place the photo on top.  It is helpful to start at the bottom and work you way up smoothing as you go.


This is what it should look like.


Then coat the entire surface with mod podge.  Be careful because you can tear the tissue paper.  Allow to dry and you are finished.  IF you want to take it a step forward you will then need to punch holes in the canvas with a large needle or an illet setter.  


Put lights through and you are finished!

If you have questions be sure to email


Hope you enjoy!  And if you are in a bind for a Christmas present, you could do the same process with a photo of your children for your parents, or a scan an art project of your child's and apply the same way!


Friday, December 2, 2011

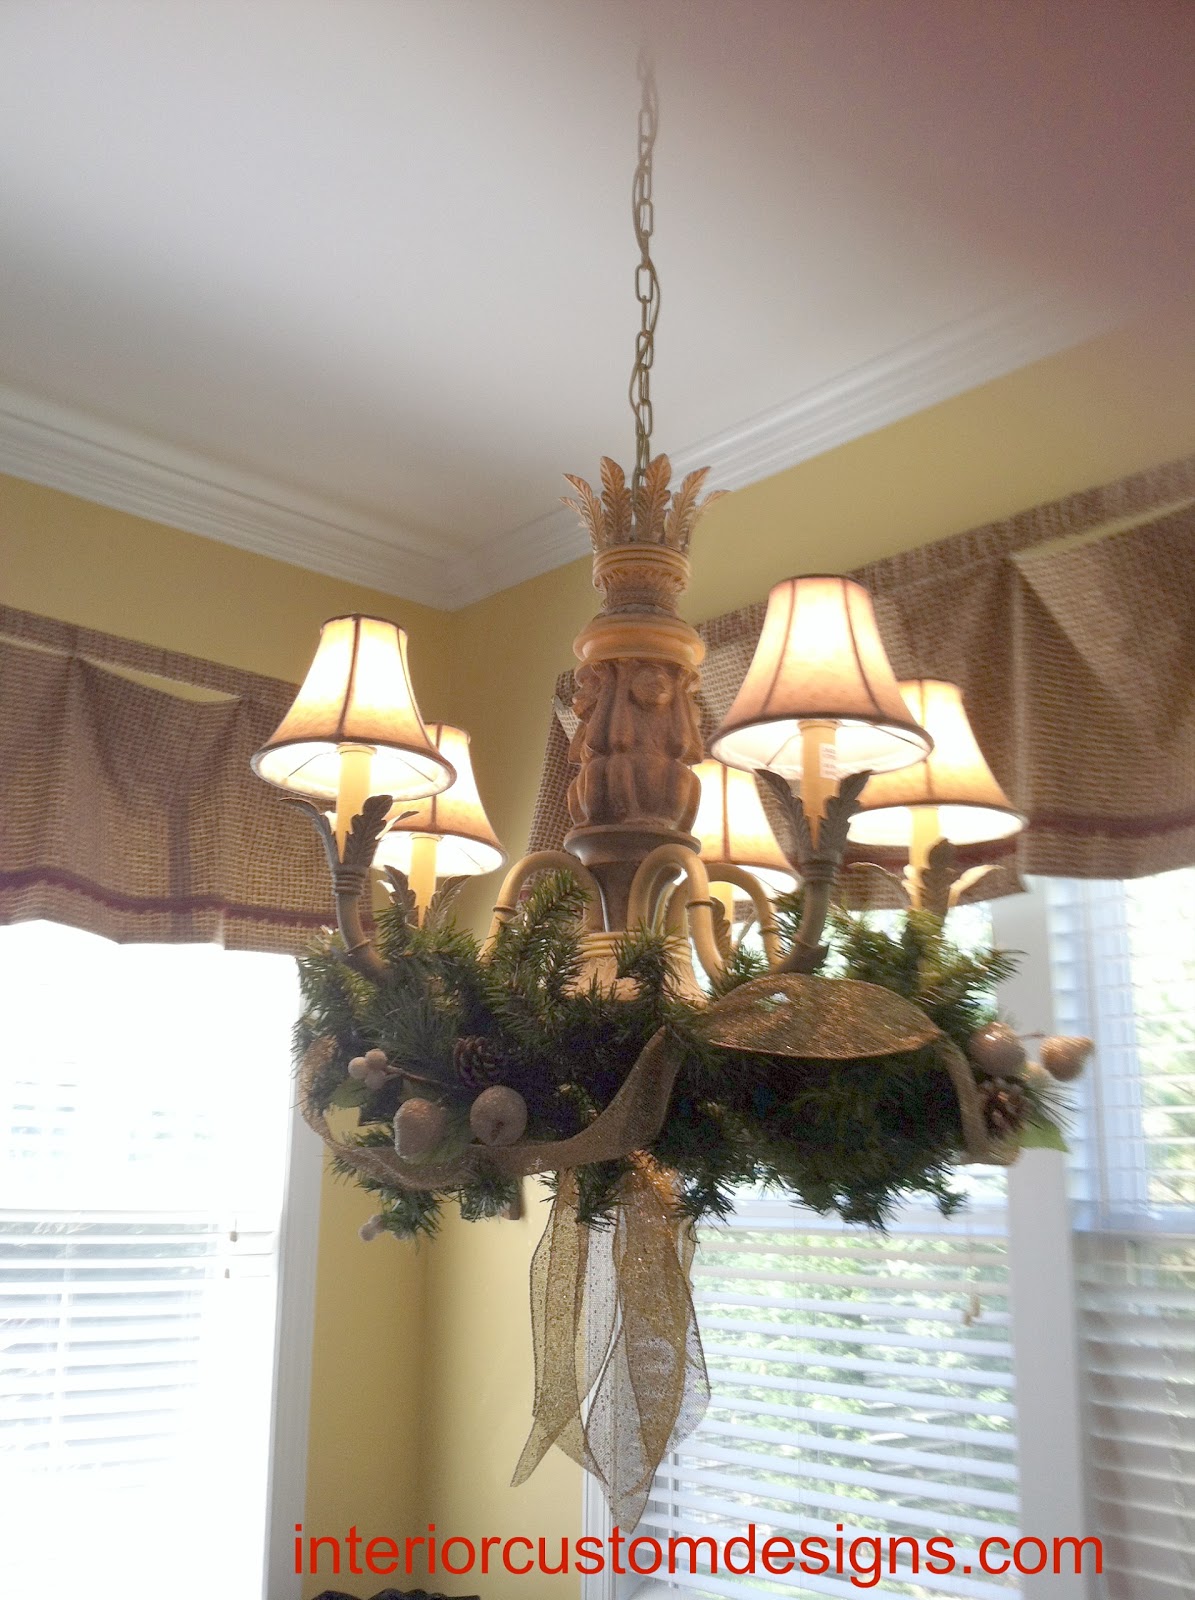
Christmas Chandelier


Here is another project to help with Christmas decorating.  You only need a wreath some picks and a little ribbon.


Open up the pieces and just twist them on the chandelier arms.


Arrange picks around the wreath.


Add ribbon and you are done!  This picture is to show I just tied three pieces of ribbon around the bottom the have hanging down.

Have a great weekend!


Wednesday, November 30, 2011

Get your Christmas on!


For the next few weeks I am going to give decorating tips on Christmas decor!
Today we will start with a garland for the staircase.


My tip for saving some money is to buy longer pieces of pretty garland, and then cut it into pieces.  I also just cut the green garland into strips.  Later in the week I even found some pieces at the dollar store that would have made a nice look if you combined them in  this way.


So, after you have cut the pieces simply lay the cut decorative garland on the green garland and use the green garland to hold it buy just twisting garland pieces to hold.  For the ribbon this is an easy way to make one!  Just tie a bow and leave enough room to add another bow.

Count your pickets and space out the altered pieces and attach the same way by using the "leaves" of the green garland and twist them around the post.

This can be the extent of your garland, or if you choose to enhance you can do like I did and add the loopy green garland along the way, bringing to a point at the pickets where you have applied the other garland pieces.

Please feel free to email with questions.

As always I am available for design services as well.


Friday, November 11, 2011

Thanksgiving decor


Make these candles to add to your Thanksgiving decor!  They can help light a small bath, or add some to your Thanksgiving table scape.


Supplies are votive holders, leaves from the yard, some Elmers glue and a paint brush.


Remove stems from leaves.


Dilute glue with a drop or two of water, then begin glueing leaves and brushing the outside to cover.  The glue does leave a mat finish, but to me it makes it appear frosted.  After they have dried, insert a tea light and you have a pretty Thanksgiving accessory!

Happy making!!

If you like this please be sure to use your share button on Facebook.

For information on my design services, please visit my website here.


Wednesday, November 9, 2011

Ideas for headboards


Last week I challenged you to send me questions for free advice.  Here is an answer to one...


"We recently moved into a rental house.  I am looking for ideas for a headboard or some treatment to go above our bed.  It’s a king bed, and the walls are white.  I’m a do-it-yourself kind of girl and would love a few ideas."

Now the key here is a rental home, so you most likely can't do anything too permeant. The above is a sticker.  These are great because they really leave no mark, and make for a great statement.


This idea is a little more involved and shows more than one piece, but it is very easy to go to the local hardware store and have wood cut to a size you desire, then add padding and staple gun fabric.  If you make this long enough to touch the ground, you could prop this up and use the bed to hold it in place.


Lastly I have included a headboard made from a crate.  This can be attached directly to a bed frame, and if you look around a warehouse area in your town, you may even get this one for free!

Please remember to send in your questions!  I can be reached here.

See you Friday!


Friday, November 4, 2011

Super Easy Light


This is such an easy way to have an accent light in any room.


These are all the supplies needed:  A decorative lantern and some christmas lights.
Most of these lanterns come with a hole in the bottom so you can replace the candle.  Just open the lantern insert the christmas lights, and you are ready to go!


Hope you enjoy this super fast and easy project!  Have a great weekend.

And, don't forget I will be choosing a question to answer on next Wednesday's blog, so if you have one please send it to my email, here.

Friday, October 28, 2011

Dollar Store Entertaining Craft


This was a fast project and only cost $3.00, plus the cost of your glue!


Supplies are two plates one candlestick, and glue.


Glue the candlestick in the middle of the bigger plate.


Glue top of candlestick to second plate and you have a great serving piece, or display piece  for everyday use, or your next party.  I placed some silk leaves and gourds for a fall center piece.

Have a great weekend.  And remember I am always available here.

Friday, October 21, 2011

Super easy accessory


This will take you maybe 15 minutes!  

These are the supplies needed.
A plate, mine is an old one from a Southern Living party, but any will do you can even find one at the dollar store if you don't already  have one to use.  You will also need these window decal pack from an office supply store.
Decide on your design, mine was a very simple one.  But you could also choose a holiday inspired design.


  After you have made your design, read the directions on the decal sheets and print your design.  Then all you will need to do is peel off the design and apply to the plate.


Since my plate had these openings, I decided to tie ribbon around for some added interest. There you have it!


You can also hang it on a wall with a plate hook if you don't want to display the plate.

Hope you have a great weekend, and remember I am available for many services.  Visit my website, here, for a list of services.


Wednesday, October 19, 2011

Hang up that stuff!

Today I have searched to find some clever ideas for hooks.  Really these ideas should be able to be made with things you may have around the house.

This was so clever to me!  It is from  Ohdeedah and they can be found on Facebook here.
You could substitute other toys like power rangers, army men, or even Barbie heads!


This hook rack was found at Design Sponge.  The wood could be covered with left over wrapping paper or left over wallpaper.  As you can see from this photo the hooks don't even match.


In this photo from A bowl full of lemons, there are also mismatched knobs.  You could  consider using clothespins, or old and/or broken jewelry.

Hope you will find inspiration here today!  
See you Friday with an idea for a craft to do over the weekend!

Friday, September 30, 2011

Graphic number art work


I thought this was such a clever idea, and so easy to make. I have been visiting one of my favorite websites, pinterest and saw something similar. It is our families birth dates and our anniversary date. I used the computer program, printshop, to arrange the numbers and apply the graduating colors. Printshop is very affordable and it is very easy to use.


Now let me give you more detailed directions.


The supplies are shown below. You will need a plaque, I purchased mine at walmart for $3.97, a small amount of paint for the edges of the plaque, a piece of scrapbook paper, and glue.


First you will need to design and print your graphic number design on a piece of scrapbook paper. Cut to fit the plaque. Then paint the outside edges of the wooden plaque. Next, spread the glue evenly on the plaque and place your scrapbook page on top. Arrange heavy objects on top of the project to ensure a flat finished surface.

I used the finger nail file to buff the edges of the paper, and once finished I decided to highlight around the edges of the paper with brown ink. Then, attach a picture hanger and hang your art work!

In last weeks Friday blog, I had said I would do another dollar store blog, but I liked this so much, and plan to do the dollar store one another day!

Please make notice of my new addition to the blog where you can subscribe. It is very simple, and I do not even know who signs up! Keep in mind that it is possible the request will arrive in your junk box.

I am really trying to get the word out about my blog so if you know anyone who would be interested via email, or through facebook, please let them know about it. To make it easy here is a link to the blog.


Wednesday, September 28, 2011

Wall art arrangements


Arranging your pictures on the wall doesn't have to be a burden. I am going to give you a few tips to make the process a little easier.

Personally, I like not to work in the form of a grid if possible, that way you don't have to worry about making sure everything lines up. But if you want that look, just use a level and draw a chalk line, that way once everything is in place you erase the chalk.

Try to think outside the box as to which items you will place in your arrangement. Here I have made a plaque to be featured in a later blog, and gathered up letters from around the house. Also, I have taken a plate and customized it for the wall. Not to worry, I will be showing you how to
do that too at a later date.
The trick to a sucessful arrangement is laying it out on the floor, preferably below the wall it will be located on. Keep in mind the "weight" of objects it just makes more sense to have those things at the bottom of your layout. You can see in the photo above I layed it out more than once, and really just used it as an outline.

For more ideas on layouts, this photo is from the back of a frame and there are also many ideas online such as a article on HP's website available here.

So, get out your things and spice up a wall of your own.

Please feel free to email or comment with any questions.


Friday, September 23, 2011

Dollar Store Shopping

These are the after results AFTER my dollar store makeover. Below are some items I purchased at the dollar store. The trick is to think outside the box and vision making something different out of the items they have available. These projects both cost 2 dollars each.


For the mirror I laid out the rocks to make sure they would fit and then glued them with my trusty E6000 glue around the outside edge. And in an instant you have a nature inspired frame.

For the frame I disassembled the wooden puzzle, which took me way too long- I have a few problems! Yes, there are directions, but they explain how to put it back together not how to take it apart! After I had the individual pieces of the puzzle I glued them together to make something a little more interesting. Then as before I glued them to the edge of the frame! It couldn't be easier.
Good luck with this craft! Next week we will have two more very easy dollar store projects.


Friday, September 2, 2011

Can you really do any decorating for 5 dollars?


Yes! with a roll of wrapping paper. You only need some wrapping paper, scissors, tape, and maybe some spray adhesive depending on the project. In these photos I have tried to give some ideas to use throughout the home. It can be as simple as wrapping books the old fashioned way- for this you don't even need adhesive. Lining the back of a bookcase gives you an opportunity to customize a basic piece and it also allows you to add some color to your room. The framed "artwork" can be as basic as the ones shown here or you can cut out more complex shapes. For example in a child's room you may want to cut out animal shapes from animal skin printed paper, or maybe the alphabet with different colored patterned paper. Lastly, in an office setting, you can take different sized food cans and just wrap the paper around for office supplies. I have also taken thewrapping paper and covered manila folders to make them a little more special. Please feel free to email me with any questions, or just leave a comment and I will be sure to answer. Thanks for stopping by today to have a look. Be sure to visit me on facebook and my website is available here. Have a fantastic Labor day.